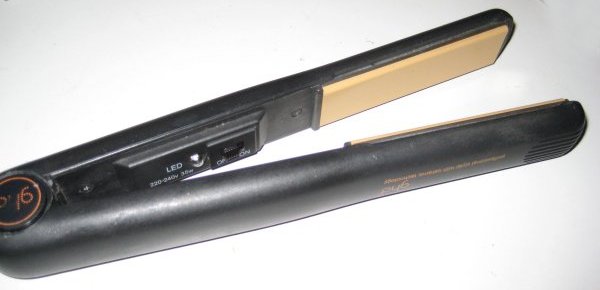
GHD 3.1B
This model is a MK3 pair of GHD straightener in Black.

Normal operation is as follows:
- Switch on => LED on constantly
- Reach operating temperature => LED flashes.
Normal causes of electrical failure are thermal fuses and cables. If a ceramic plate comes loose, then you'll probably need to replace the plastic part that holds the ceramic plate in place (see the online shop)
Instructions for replacing the cable can be found here.
Instructions for replacing the thermal fuse can be found here. (If you need to buy a thermal fuse, then see the page about purchasing a thermal fuse)
Electrical fault finding procedure for GHD 3.1B Hair Straighteners
1) Start
- Check the label opposite the On/Off switch and ensure they say the are 3.1B's... If they are not, then you are reading the wrong fault finding procedure!
- Plug them in, turn them on and look at the red light:
- It's on (at least some of the time).... Go to section 2.
- It's not on at all or is very dim.... Go to section 3
2) Light comes on
- Does the light flash on and off when you move the straighteners?
- Yes - your cable might need replacing / fixing - go to section 5.
- Do they come on, heat up and then go off?
- Yes - your thermal fuse could be intermittent. You can check this by taking them apart (see section 4) and testing the thermal fuse (see section 6)
- Does the light go off when you close the two arms together?
- Yes - the wires to one of the heaters may be about to break. You can check this by taking them apart (see section 4) and testing the heaters (see section 7)
- Yes - the thermal fuse could be intermittent. You can check this by taking them apart (see section 4) and testing the thermal fuse (see section 6)
- Hopefully you've said yes to one of those two questions, as I'm not aware of any other common problems!
3) They are dead - no light
- Look at the red light very closely... is it glowing very dimly? (a darkened
room will help).
- Yes - one (or both) of the heater elements is probably broken and needs replacing. Continue reading this section, so we can confirm this theory.
- Turn them off and disconnect them from the mains. Time to take them apart.... go to section 4 and return here once you've done it.
- Check the resistance of the following components:
- Cable - zero ohms between each plug pin and it's wire on the PCB.
- Thermal fuse - See section 6.
- Heater elements - See section 7.
If any of those resistances don't agree, then you've probably found the fault. If they all agree, then you've got an unusual problem and you'll need to do your own investigations to try and find the problem.
4) Taking them apart
- Firstly turn them off and disconnect them from the mains!
- Using a small flat head screw driver, pop the caps off the hinge.
- Using two cross head screw drivers (one on each side of the hinge) undo the hinge. It may seem very tight, but this is normal - twist until you hear a "crack" and then they will come undone easily.
- Push the metal hinge pin out using a screw driver
- You can now seperate the two arms, although they will be connected with some wires.
- Remove the covers on each arm. You'll need to remove two cross head screws for each cover.
5) Testing the cable
- Check the cable for damage. If there are any bits of cable that are cut / melted / tightly kinked then you should probably replace it even if it works ok.
- Now plug the GHDs into the mains and lay them (and all the cable) on a table.
- Turn them on.
- Wobble the cable where it comes out of the 13A plug without allowing any other movement of the cable. If this causes the light to flash or you hear a buzz/fizz sound, then turn them off, disconnect them from the mains and cut the plug and a few centimeters of wire off and fit a new 13A plug (with 3 Amp fuse). That should hopefully fix them. If not then....
- Wobble the cable where it goes into the GHD's at the rotating joint. If this causes the light to flash or you hear a buzz/fizz sound then you'll need to fit a new cable. See the cable replacment page for instructions and the shop to buy the new cable.
- If the cables passes those tests, then it's probably ok, so go back to the section you came from and continue fault finding.
6) Testing the thermal fuse
The thermal fuse is the two brown wires coming out of the ceramic plate assembly on one arm of the GHD's. If you put a multimeter across those two terminals, then it should be be zero ohms. If you've got an intermittent pair of GHD's, then you may want to try pulling / pushing on the wires slightly whilst measuring the resistance to see if it's the thermal fuse that is causing this.
Instructions for replacing the thermal fuse can be found here.
If you need to buy a thermal fuse, then see the page about purchasing a thermal fuse
7) Testing the heaters
There are two heaters - one in each arm. They are connected to the PCB's with white/clear wires coming out of the ceramic plate assembly. When attached to the PCB, the heaters are in parallel so should measure 80 Ohms. If this is not the case, disconnect the heaters from the PCB and measure them independently - they should be 160 Ohms each.
Was this guide useful? Can you suggest any improvements? If so post your thoughts on the comment section of the forum!
Operating Temperatures
![]() |
![]() |
186°C |
194°C |
183°C |
194°C |
Other Potentially Useful Pictures

All content © Gary Ewer 2007-08. Website Terms & Conditions


