GHD 3.1b Thermal Fuse Replacement How-to
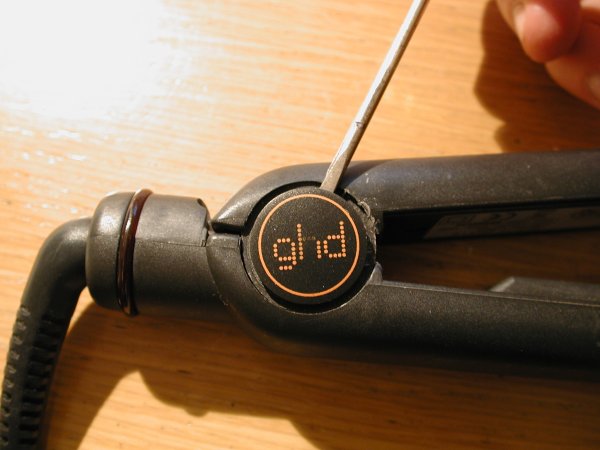
1) Remove the caps covering the hinge pin screws
Carefully use a screw driver to pop the caps off. They are held in place by a clip at 12 o'clock and 6 o'clock (when the ghd logo is rotated as below)
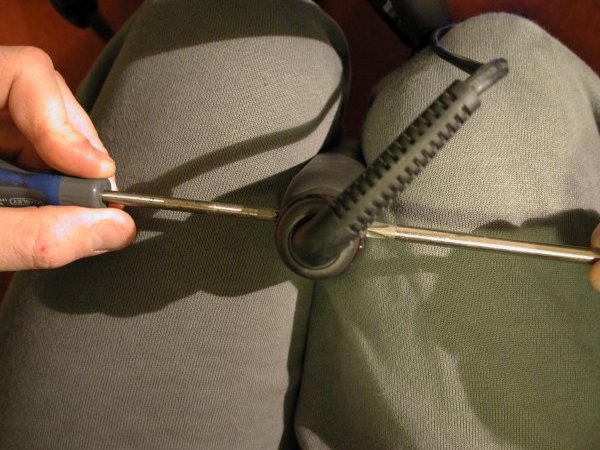
2) Undo the hinge pin
It may not look the most elegant, however I've come to the conclusion that the easiest way to remove the hinge pin is to put the GHD's between your legs, and then undo the screws with a screw driver in each hand. Make sure you use the correct size screw driver, as this screw is often very tight. It undoes anti-clockwise (as a normal screw thread). If you twist hard enough, you'll hear a crack, and then it'll come undone easily.
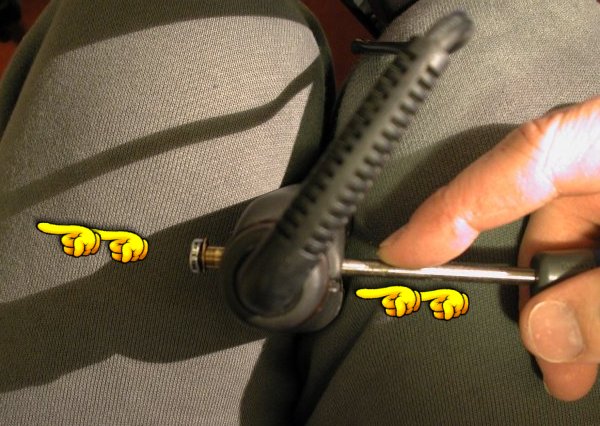
3) Push the hinge pin out
The screw will come off on one side, and then use a screw driver to push the pin out.
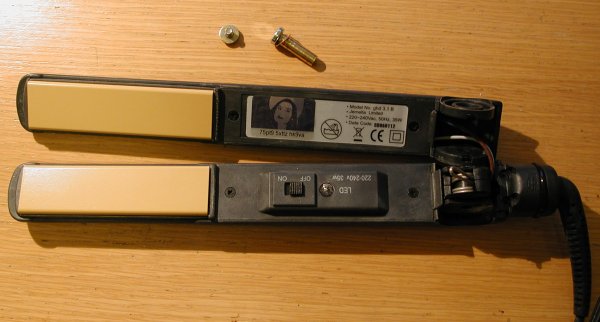
4) Seperate the two arms
Just take care with the wires that go around the hinge.
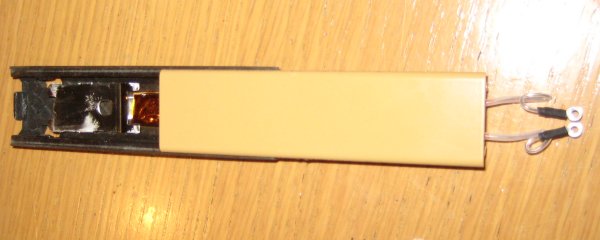
5) Remove the cover on the switch side
Just undo the two small screws and then the cover can be removed.

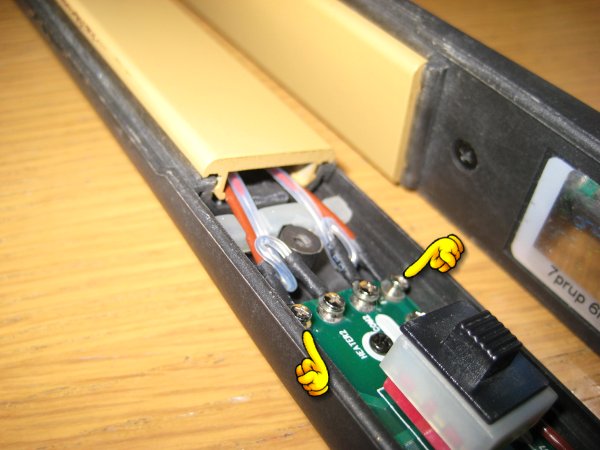
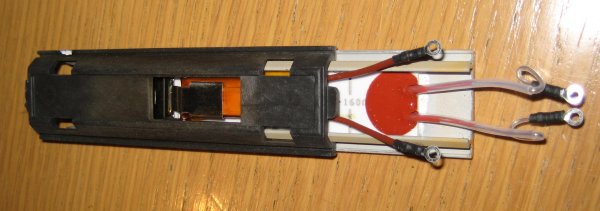
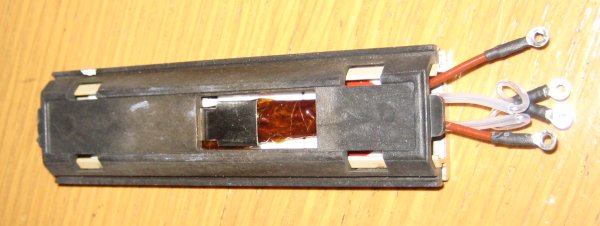
6) Remove the heater plate and thermal fuse
First off, you can just double check that the thermal fuse has failed using a multimeter - if it's failed there will be no continuity between the brown wires (see the arrows on the photo below).
If you are convinced you need to replace the thermal fuse, then undo all 4 small screws that are in a row at the end of the PCB.
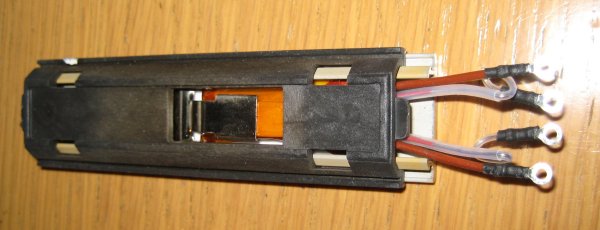
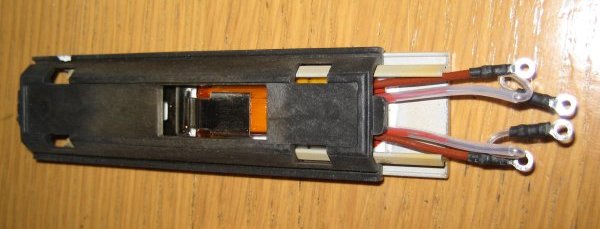
The heater plate sub assembly will now come out:
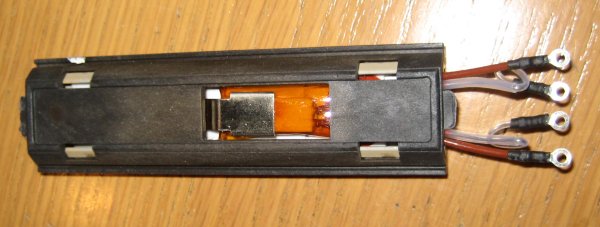
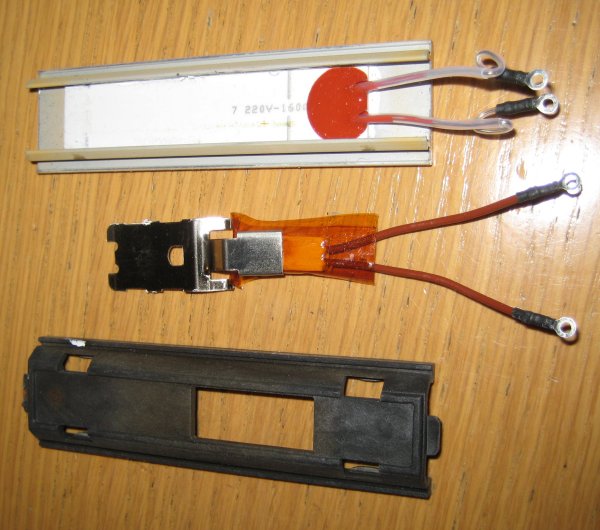
7) Dismantle the heater plate sub assembly
The only way to do this is to slide the plastic part off the ceramic plate. Take care not to push the plastic part in the wrong direction, as it will break!
As you slide, the thermal fuse and metal clip will move as well. The white heater element (note: take care with this compenent as it's quite brittle) sometimes moves a little bit as well so take a note of how far the wires protruded before you start fiddling.
8) Swap the thermal fuse and put it back together
If you need to buy a thermal fuse, then they are available from our shop - purchasing a thermal fuse
Putting it back together is the reverse of taking it apart (!!). Just put all the components in the right place, and then slide it all back together. If the new thermal fuse has been crimped correctly, then you should be able to gently pull on the brown wires. This often helps get everything back in the right positions. Take care not to damage the kapton tape insulation, as this is very important (you could get a bit of a
If the white heater plate needs repositioning, then you can carefully do this using a flat bladed screw driver, pushing against the appropriate end of the heater to move it.
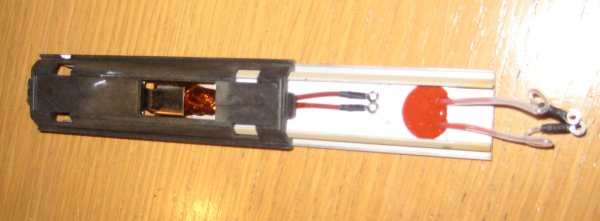
9) Replace the heater plate sub assembly and put the GHD's back together
Now just drop the sub assembly back into the GHD's and put it all back togther. Here are some general hints for how it goes back togther:
- When you screw the heater and thermal fuse terminals back onto the PCB, make sure the thermal fuse (brown) wires are on the outside and the heater (white) wires are in the middle.
- Make sure the wires from the heater sub assembly go through the dips in the protective rubber bit on the housing.
- Don't forget the two bits of plastic that go on top of the power switch. There is a white bit, and the black switch bit.
- Take care not to catch the wires that go between arms of the GHD's. They should go the "long way round" the spring.
- Use a screw driver to line up all the components of the hinge. Once they are visually all lined up, then insert the hinge pin.
- If the hinge pin won't go in fully, then check the washer - it always gets caught in the wrong place!!
- If things aren't quite lined up when you put the hinge pin in, then use a cross head screw driver to wobble the hinge pin slightly from the female thread side (whilst pushing on the screw head).
10) Testing
When you first turn the straighteners on after replacing the thermal fuse, keep a very close eye on them. A bit of smoking is normal (dust burning off), however if they seem to be getting hotter and hotter, and the LED doesn't start flashing, then you may have a faulty PCB (i.e. the original fuse failed for a good reason!).
Therefore just take care and don't assume they are working perfectly again until you've seen them working perfectly!
Short URL for this page: